Watson Developer Cloud Unity SDKが公開されていたので、使ってみました
Watsonとは
ワトソンは、IBMが開発した質問応答システム・意思決定支援システムである。
『人工知能』と紹介されることもあるが、IBMはワトソンを、自然言語を理解・学習し人間の意思決定を支援する『コグニティブ・コンピューティング・システム(Cognitive Computing System)』と定義している
Watson Developer Cloud - Unity SDK
Githubの場所です。
https://github.com/watson-developer-cloud/unity-sdk
下記は日本語で簡単に手順まとめました。
登録周りから
1. IBM Blumemixに登録
30日間は評価版が使えるみたいです。
https://console.ng.bluemix.net/registration/
2. Unityをインストール
Watson Unity SDKのインストール
1. unity-sdkをダウンロード
下記からダウンロード。unity-sdk-0.3.0.zipがダウンロードできました(2016/05/28時点)
https://github.com/watson-developer-cloud/unity-sdk
2. Unityに配置
package形式ではなくそのまま突っ込み、
"unity-sdk-0.3.0"を"Watson"にRenameしておく
アカウント設定からアプリ登録へ
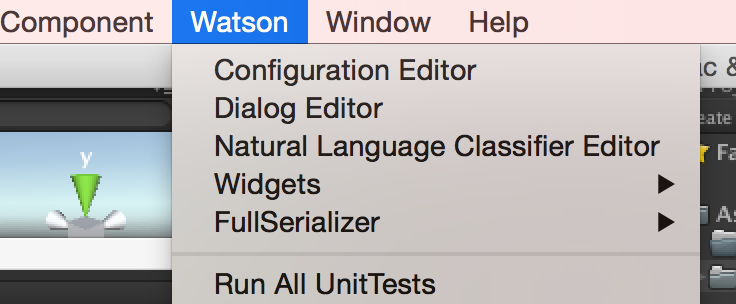
BlumixのアカウントをUnityで紐付ける
1. Bluemixのサイトへ
2. WatsonのLanguage Translationのサービスを追加
ダッシュボードから、サービス名を"Language Translation-DEMO"に設定
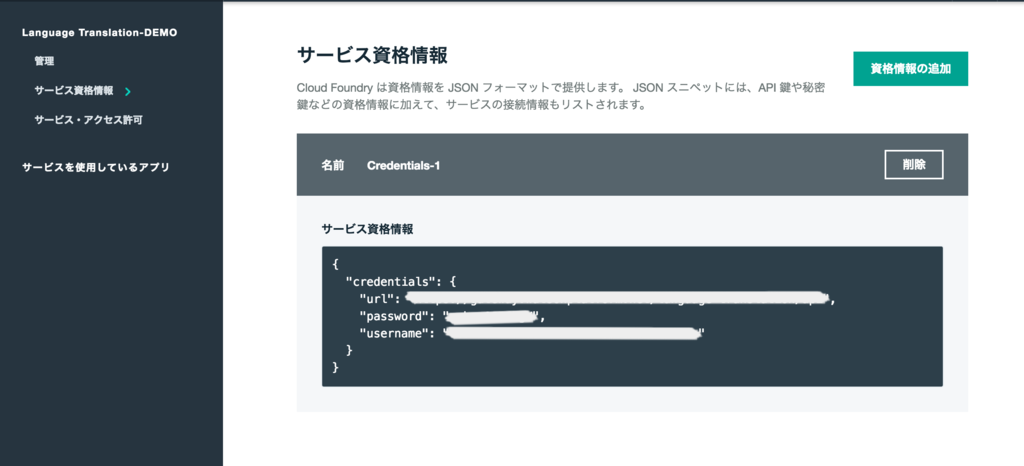
3. サービス資格情報のデータをコピペ
サービス資格情報のタブを開いてjsonデータをコピーする

コードをかいてみる
1. 公式のサンプルソースを実行してみます
using IBM.Watson.DeveloperCloud.Services.LanguageTranslation.v1;
using UnityEngine;
using System.Collections;

public class SampleLanguageTranslation : MonoBehaviour {

	private LanguageTranslation m_Translate = new LanguageTranslation();
	private string m_PharseToTranslate = "How do I get to the disco?";

	void Start ()
	{
		Debug.Log("English Phrase to translate: " + m_PharseToTranslate);
		m_Translate.GetTranslation(m_PharseToTranslate, "en", "es", OnGetTranslation);
	}

	private void OnGetTranslation(Translations translation)
	{
		if (translation != null && translation.translations.Length > 0)
			Debug.Log("Spanish Translation: " + translation.translations[0].translation);
	}
}
2. Consoleログ
翻訳されたログが発行されます。
英語->スペイン語に変換されているみたいです

"ja"指定だと動作しなかったので、まだ日本語はLanguageTranslationで未対応っぽい
Speech to TextとText to Speechを使ってみる
アプリ登録して、Unityに紐付けさせる
LanguageTranslationと同様に、BluemixのダッシュボードからSpeech to TextとText to Speechを登録
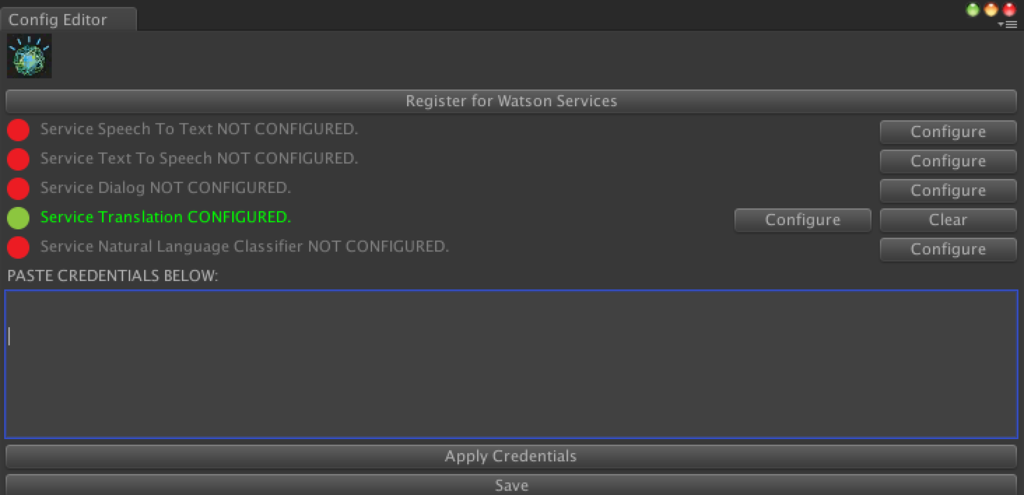
Unityにサービス資格情報を設定する
サービスが二つとも緑になっていればOK

Text to Speechのコードを書く
定義した日本語の文章を読んでくれます
using IBM.Watson.DeveloperCloud.Services.TextToSpeech.v1;
using UnityEngine;
using System.Collections;

public class SampleTextToSpeech : MonoBehaviour {
	TextToSpeech m_TextToSpeech = new TextToSpeech();
	string m_TestString = "こんにちは。テキストを読んでいます。漢字を含めた文章を読むことができるんだよ。";

	void Start ()
	{
		m_TextToSpeech.Voice = VoiceType.ja_JP_Emi;
		m_TextToSpeech.ToSpeech(m_TestString, HandleToSpeechCallback);
	}

	void HandleToSpeechCallback (AudioClip clip)
	{
		PlayClip(clip);
	}

	private void PlayClip(AudioClip clip)
	{
		if (Application.isPlaying && clip != null)
		{
			GameObject audioObject = new GameObject("AudioObject");
			AudioSource source = audioObject.AddComponent<AudioSource>();
			source.spatialBlend = 0.0f;
			source.loop = false;
			source.clip = clip;
			source.Play();

			GameObject.Destroy(audioObject, clip.length);
		}
	}
}
実行するとこんな感じ
youtu.be
Speech to Textのコードを書く
音声ファイルを取得し、stringを吐き出せます
とりあえず英語をテキストに変換させることはできました
using IBM.Watson.DeveloperCloud.Services.SpeechToText.v1;
using UnityEngine;
using System.Collections;

[RequireComponent (typeof (AudioSource))]
public class SampleSpeechToText : MonoBehaviour {
	private SpeechToText m_SpeechToText = new SpeechToTe
xt();

	IEnumerator Start()
	{
		// 音声をマイクから3秒間取得
		Debug.Log ("Start record");
		var audioSource = GetComponent<AudioSource> ();
		audioSource.clip = Microphone.Start(null, true, 10, 44100);
		audioSource.loop = false;
		audioSource.spatialBlend = 0.0f;
		yield return new WaitForSeconds (3f);
		Microphone.End (null);
		Debug.Log ("Finish record");

		// ためしに録音内容を再生してみる
		audioSource.Play ();

		// 音声をテキストに変換
		m_SpeechToText.Recognize(audioSource.clip, HandleOnRecognize);
	}

	void HandleOnRecognize (SpeechResultList result)
	{
		if (result != null && result.Results.Length > 0)
		{
			foreach( var res in result.Results )
			{
				foreach( var alt in res.Alternatives )
				{
					string text = alt.Transcript;
					Debug.Log(string.Format( "{0} ({1}, {2:0.00})\n", text, res.Final ? "Final" : "Interim", alt.Confidence));
				}
			}
		}
	}
}
Unityで簡単に使えるのはありがたい!


